

How to Set Up Meta Business Manager: Step-by-Step Guide for Businesses
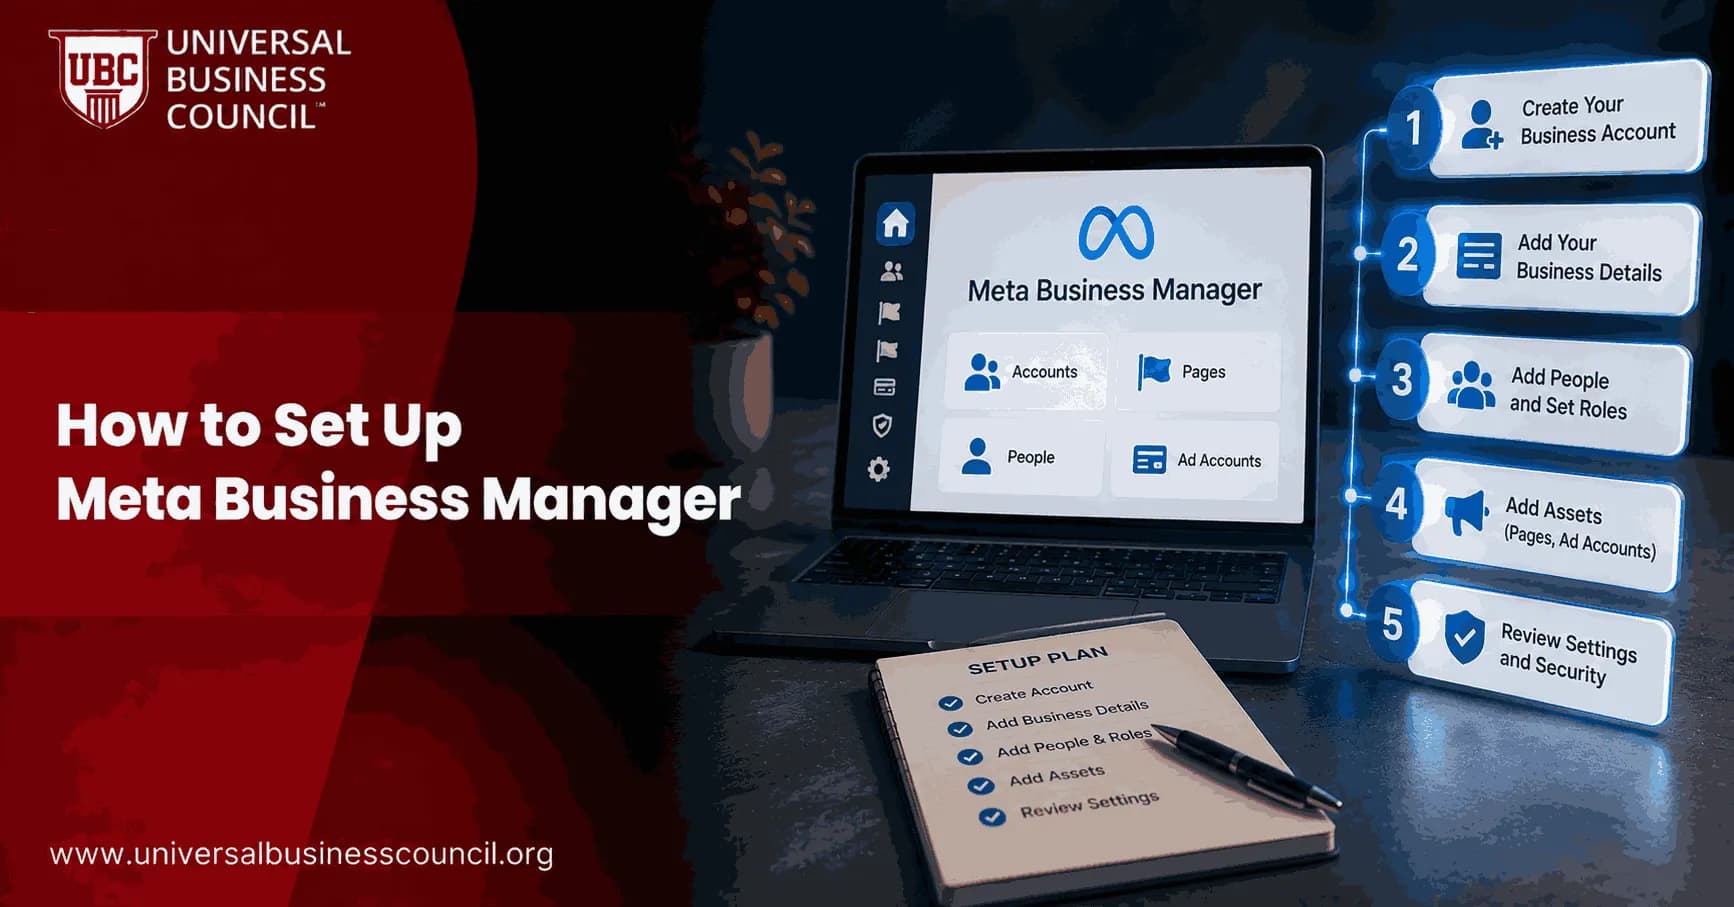
Setting up Meta Business Manager correctly is one of the most important steps for anyone planning to advertise on Facebook or Instagram. Whether you are a complete beginner launching your first campaign or a marketing professional managing multiple client accounts, getting this setup right from the start prevents confusion, delays, and costly mistakes later on.
Officially, Meta now refers to this system as "Business Portfolio," though the term Meta Business Manager remains far more widely used across the industry. Regardless of the name, its purpose stays the same: it acts as a centralized control panel where businesses manage Pages, ad accounts, team members, and other digital assets from a single dashboard.

This guide walks through the entire setup process step by step, in plain language that works for beginners while still being detailed enough for professionals who want to get every setting right. By the end, you will understand not just how to create an account, but how to configure it securely and efficiently for long-term use.
Why Setting Up Meta Business Manager Properly Matters
Before diving into the steps, it helps to understand why this process deserves careful attention rather than a rushed five-minute setup. A properly configured Meta Business Manager account protects your business in several important ways.
First, it separates personal and business activity, so your team members and agency partners never need access to anyone's personal Facebook profile. Second, it centralizes control over every asset your business owns, from Pages to pixels to payment methods, reducing the risk of lost access or scattered permissions. Third, correct setup from the beginning, particularly around security and verification, prevents the kind of account restrictions or suspensions that can halt advertising campaigns unexpectedly.
For marketers who want to move beyond basic setup and build genuine strategic skill, pursuing a Certified Meta Ads Expert certification early on can provide a structured foundation, covering not only account setup but also campaign strategy and optimization once your account is live.
What You Need Before You Start
Preparation before beginning the setup process saves considerable time and avoids frustrating delays partway through. Gather the following information first:
Your legal business name, exactly as it appears on official documents
A dedicated business email address, ideally not tied to your personal accounts
Your business address and phone number
A personal Facebook account, used only for identity verification and never displayed publicly
Legal business documents, such as registration certificates, for later verification steps
Having these details ready means you can complete the entire process, including verification, in one sitting rather than returning to it multiple times.
Step-by-Step Guide to Setting Up Meta Business Manager
Step 1: Create Your Business Account
Go to business.facebook.com and click "Create Account." You will need to be logged into the personal Facebook account you intend to use as the primary administrator. This personal account is used purely for identity confirmation and will not appear publicly connected to your business.
Step 2: Enter Your Business Details
Enter your official business name exactly as it appears on your website or legal documents, along with your business email address. Consistency here matters, since mismatched business names across platforms can complicate verification later.
Step 3: Verify Your Email
Check your inbox for a confirmation message from Meta and click the verification link. This step confirms that the email address is active and controlled by you, and it is required before you can proceed further.
Step 4: Add Your Core Assets
Once your account is created, begin adding the assets your business already owns. The two most important assets to add first are your Facebook Page and your Instagram account. To add a Page, navigate to Business Settings, select "Pages" under the Accounts section, and either add an existing Page or create a new one. Instagram accounts can be connected the same way, and if you do not yet have one, you can create it directly within the setup flow.
Step 5: Set Up Your Ad Account
Next, create or connect your advertising account. If you already boosted posts directly from a Facebook Page in the past, note that this is the most limited way to advertise; setting up a proper ad account within Meta Business Manager unlocks the full Ads Manager, including advanced targeting, complete campaign objectives, and detailed performance reporting.
Step 6: Add Payment Information
Add a valid payment method to your ad account so that campaigns can run without interruption once you are ready to launch. Meta Business Manager supports multiple payment methods across different ad accounts if your business manages several campaigns or clients simultaneously.
Step 7: Install and Test the Meta Pixel
If your business has a website, create a Meta Pixel by navigating to Events Manager, clicking "+ Add," and naming it clearly, typically your business name followed by "Pixel." Enter your website URL and follow the installation instructions. Install the Pixel across every page of your website, not only the homepage, since partial coverage significantly limits the quality of your remarketing and lookalike audience data. After installation, use the Meta Pixel Helper browser extension to confirm the Pixel is firing correctly, and use the "Test Events" tool within Events Manager to verify that key conversion events, such as purchases or leads, are being recorded properly.
Step 8: Invite Team Members and Partners
Under Business Settings, select "People" to invite team members, or "Partners" to grant access to external agencies or freelancers. When inviting someone, enter the email address associated with their Facebook account, and assign them an appropriate role based on what they actually need to do, rather than granting broad access by default.
Step 9: Assign Administrator Roles Carefully
Always ensure at least two people hold full administrator access to your Meta Business Manager account. This redundancy protects your business in case one administrator loses access, changes roles, or is unexpectedly locked out, ensuring the business never loses control of its own assets.
Step 10: Enable Two-Factor Authentication
Under Business Settings, in the security or authentication section, set two-factor authentication as mandatory for everyone with access to the account. This single setting represents one of the strongest protections available against unauthorized access, account takeovers, and the kind of security incidents that can lead to sudden ad account suspensions.
Step 11: Complete Business Verification
Navigate to the verification section within Business Settings and enter your legal business details, including your registered name and address. Upload the requested legal documents, such as business registration certificates, to complete verification. While not always mandatory for very small accounts, business verification significantly reduces the risk of restrictions and makes account recovery far easier if problems ever arise.
Following these eleven steps in order typically takes under an hour for a straightforward setup, though verification timelines can vary depending on how quickly Meta processes submitted documentation.
Understanding Assets, Roles, and Permissions
Once your basic setup is complete, it helps to understand how Meta Business Manager organizes access more deeply, since this structure affects nearly everything you do going forward.
Every Page, ad account, pixel, and catalog inside Meta Business Manager is referred to as an "asset." Rather than granting access to each asset individually, larger businesses can use Business Asset Groups to bundle related assets together and assign access to an entire group in a single action. This dramatically reduces onboarding time when adding new employees or agency partners, and it minimizes the risk of accidentally leaving someone with excess access to assets they no longer need.
Roles within Meta Business Manager range from full administrative control to limited, task-specific access, such as advertiser-only or analyst-only permissions. Assigning the correct role from the start, rather than defaulting everyone to admin access, is one of the simplest ways to reduce long-term security risk.
Common Setup Mistakes to Avoid
Even straightforward setups can go wrong in predictable ways. Avoiding these common mistakes saves significant time and frustration.
One frequent error involves skipping business verification entirely, which can lead to unexpected account restrictions once advertising spend increases. Another common mistake is installing the Meta Pixel only on a homepage rather than site-wide, which severely limits the data available for targeting and remarketing later. Many businesses also make the mistake of assigning only one administrator to their account, creating a single point of failure if that person loses access unexpectedly.
Finally, neglecting two-factor authentication remains one of the most avoidable yet consequential mistakes, since compromised accounts are a leading cause of sudden advertising disruptions. Addressing each of these areas during initial setup, rather than after a problem occurs, is always the more efficient approach.
Setting Up for Agencies Managing Multiple Clients
Agencies face additional considerations when setting up Meta Business Manager, since they typically manage numerous client accounts rather than a single business.
Rather than requesting personal login credentials from clients, agencies should always use the "Partners" feature to request access to client assets directly. This approach keeps each client's assets clearly separated while still allowing the agency team appropriate access to manage campaigns. Agencies should also standardize their internal role assignments across all client accounts, ensuring consistency and reducing the chance of permission errors as team members move between projects.
For agencies and freelancers who want to formalize their expertise beyond basic setup knowledge, expanding into a broader Certified Digital Marketing Expert certification can help professionals understand how Meta Business Manager setup fits into a complete, multi-channel marketing strategy rather than existing as an isolated technical task.
Maintaining Your Meta Business Manager After Setup
Initial setup is only the beginning. Ongoing maintenance ensures your account stays secure, organized, and effective as your business grows.
Periodically review who has access to your account and remove permissions for anyone who no longer needs them, particularly former employees or agencies whose contracts have ended. Regularly check that your Meta Pixel is still firing correctly, especially after website redesigns or platform migrations, since broken tracking can silently undermine campaign performance for weeks before anyone notices. Additionally, stay informed about new features Meta introduces, since the platform continues to evolve with increasingly automated, AI-driven tools that can affect how campaigns are best managed.
Learning Path: From Basic Setup to Advanced Meta Advertising Skills
For those who want to grow beyond simply knowing how to set up Meta Business Manager, a structured learning path helps build lasting, career-relevant expertise.
Begin by mastering the setup process covered in this guide, then move toward practical, hands-on campaign management to build real familiarity with Ads Manager. From there, pursue the Certified Meta Ads Expert certification to validate your skills in campaign strategy, audience targeting, and performance optimization specifically within Meta's advertising ecosystem.
Once this foundation is solid, expand into the Certified Digital Marketing Expert certification to understand how Meta advertising fits within a broader, multi-channel marketing strategy. For professionals who want to build additional technical versatility, further Tech Certification options provide exposure to adjacent technology skills increasingly relevant to modern marketing operations. Finally, those interested in how emerging technologies are reshaping digital business more broadly can explore Deep Tech Certification options to stay informed about the next wave of digital transformation.
This progression, from setup fundamentals, to Meta-specific certification, to broader marketing and technology expertise, provides a well-rounded, practical career path rather than isolated platform knowledge.
Conclusion
Learning how to set up Meta Business Manager correctly is a foundational skill for anyone serious about advertising on Facebook and Instagram. Following the step-by-step process outlined in this guide, from account creation and asset setup to security configuration and business verification, ensures your account is protected, organized, and ready to scale as your advertising needs grow.
By combining a properly configured Meta Business Manager account with structured learning, starting with a Certified Meta Ads Expert credential and expanding into a Certified Digital Marketing Expert path, both beginners and experienced professionals can move from basic technical setup toward genuine, career-relevant advertising expertise.
Frequently Asked Questions
1. How long does it take to set up Meta Business Manager?
A straightforward setup typically takes under an hour, though business verification may take additional time depending on how quickly documentation is processed.
2. Do I need a personal Facebook account to set up Meta Business Manager?
Yes, a personal Facebook account is required for identity verification, though it remains separate from your business activity and is not publicly visible.
3. Is Meta Business Manager free to set up?
Yes, creating and setting up a Meta Business Manager account is completely free; costs only apply to actual advertising spend.
4. What information do I need before starting the setup process?
You will need your legal business name, a business email address, your business address and phone number, and eventually legal documents for verification.
5. How do I add my Facebook Page to Meta Business Manager?
Go to Business Settings, select "Pages" under the Accounts section, and either add an existing Page or create a new one directly within the platform.
6. What is the Meta Pixel, and why should I install it during setup?
The Meta Pixel is a tracking code that records visitor actions on your website, and installing it early ensures accurate data collection for targeting and remarketing as your campaigns grow.
7. Why should the Meta Pixel be installed on every page, not just the homepage?
Full-site coverage ensures accurate conversion tracking and provides enough data to build effective remarketing and lookalike audiences, which partial installation cannot support.
8. How many administrators should a Meta Business Manager account have?
At least two administrators are recommended to prevent losing access to the account if one administrator becomes unavailable or is locked out.
9. Is two-factor authentication necessary for Meta Business Manager?
Yes, enabling two-factor authentication for all users is one of the most effective ways to protect your account from unauthorized access and unexpected suspensions.
10. What is business verification, and is it required?
Business verification confirms your company's legal identity through submitted documents; while not always mandatory for small accounts, it significantly reduces the risk of account restrictions.
11. Can agencies manage multiple clients through one Meta Business Manager setup?
Yes, agencies should use the Partners feature to request access to each client's assets separately, avoiding the need for personal login credentials.
12. What happens if I skip business verification during setup?
Skipping verification can lead to advertising restrictions or account limitations later, particularly as ad spend increases or account activity grows.
13. Can I change the primary administrator after setup is complete?
Yes, administrator roles can be reassigned within Business Settings, though it is best practice to always maintain at least two active administrators at any time.
14. What are Business Asset Groups, and when should I use them?
Business Asset Groups allow you to bundle related assets and grant access to an entire group at once, which is especially useful for larger teams or agencies managing multiple accounts.
15. Do I need a website to set up Meta Business Manager?
No, a website is not required to create an account, though installing the Meta Pixel, which requires a website, significantly improves tracking and targeting capabilities.
16. How do I know if my Meta Pixel is working correctly?
Use the Meta Pixel Helper browser extension and the "Test Events" tool within Events Manager to confirm that the Pixel is firing and recording conversion events accurately.
17. Can I use Meta Business Manager without running paid ads?
Yes, businesses can use it to manage Pages, Instagram accounts, and team access even without immediately running paid advertising campaigns.
18. What is the difference between adding a team member and adding a partner?
Team members are typically individuals directly employed by your business, while partners refer to external agencies or freelancers granted access through a separate permissions process.
19. How often should I review permissions after initial setup?
Permissions should be reviewed periodically, particularly after employee departures or the end of agency contracts, to ensure access remains accurate and secure.
20. What should I learn after completing the basic Meta Business Manager setup?
After setup, focus on learning Ads Manager fundamentals, audience targeting strategy, and eventually pursue structured certification to build verified, professional-level expertise.
Related Articles
View All
Meta Ads
How to Set Up Meta Ads Manager
Meta Ads Manager is the primary platform for creating, managing, and optimizing advertising campaigns across Facebook, Instagram, Messenger, and the Meta Audience Network. This guide explains how to set up Ads Manager and prepare your account for effective campaign management.
Meta Ads
What Is Meta Business Manager?
Meta Business Manager is a free platform that helps businesses manage Facebook Pages, Instagram accounts, ad accounts, team permissions, and business assets from a single dashboard. Learn how it works, its key features, and why it's essential for managing Meta Ads.
Meta Ads
Meta Ads Manager Guide: Create, Manage, and Analyze Campaigns
A practical Meta Ads Manager guide for setting up campaigns, managing budgets and audiences, tracking events, and analyzing ROAS, CPA, CTR, and conversions.
Trending Articles
The Role of Blockchain in Ethical AI Development
How blockchain technology is being used to promote transparency and accountability in artificial intelligence systems.
AWS Career Roadmap
A step-by-step guide to building a successful career in Amazon Web Services cloud computing.
Top 5 DeFi Platforms
Explore the leading decentralized finance platforms and what makes each one unique in the evolving DeFi landscape.