

Google Ads Conversion Tracking Setup: A Practical Guide
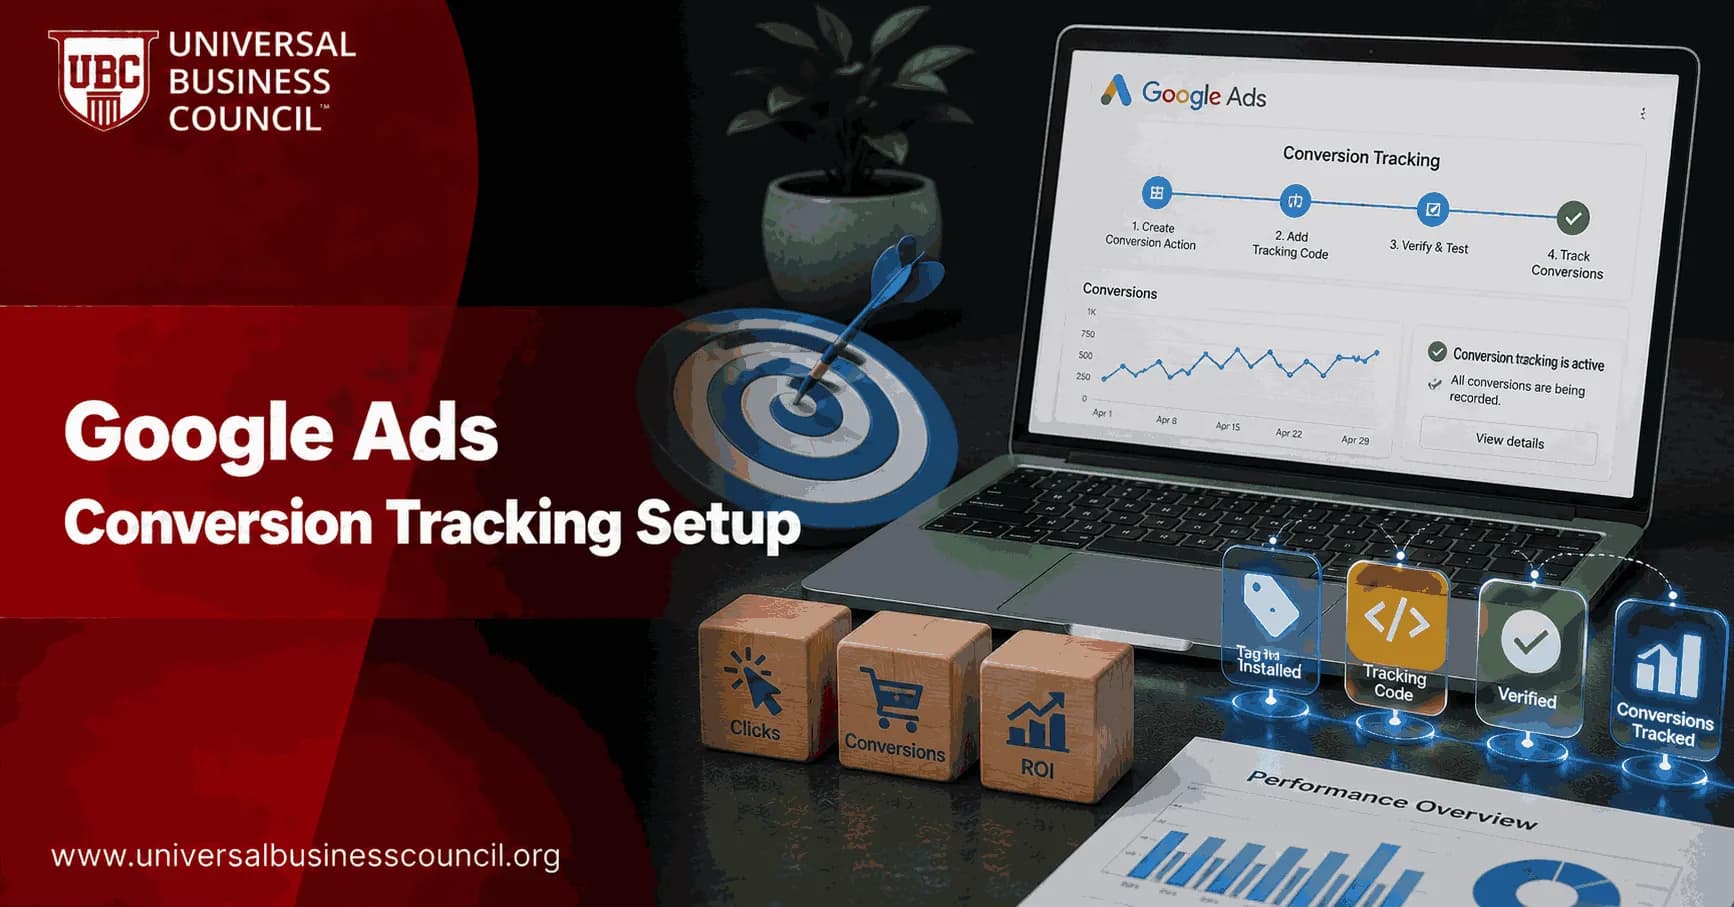
Google Ads conversion tracking setup is not just a tag installation job. It decides what Google Ads learns, what automated bidding optimizes for, and whether your reported CPA or ROAS can be trusted. Get the setup wrong and you may scale the wrong campaign. I once watched a simple thank-you page count page refreshes as new leads, which made a B2B account look about 20 percent more efficient than it really was. Painful, but common.
This guide gives you a practical workflow using the Google tag, Google Tag Manager, the conversion linker, enhanced conversions, and server-side tracking where it makes sense. Use it as a checklist before you spend more budget.

As Google Ads automation becomes increasingly dependent on accurate conversion data, marketers need practical expertise in campaign setup, tracking implementation, bidding strategies, and performance optimization. A Certified Google Ads Expert credential helps professionals develop these skills, enabling them to build reliable measurement frameworks that support better advertising decisions.
What Google Ads Conversion Tracking Actually Measures
Google Ads defines a conversion as a valuable user action: a purchase, lead form submission, phone call, sign-up, or another business outcome. You manage these actions in Goals > Conversions > Summary in the current Google Ads interface.
Here is the key point. Do not track every small engagement as a primary conversion. A pricing-page visit may be useful, but it should not train Target CPA bidding the same way a qualified demo request does.
Core components you need to understand
Conversion action: The goal you create in Google Ads, such as Purchase or Lead.
Google tag: The base tag, also called gtag.js, that loads across your site and connects events to Google products.
Event snippet or conversion event: The specific signal sent when a conversion happens.
Google Tag Manager: A tag management system that controls tags, triggers, and variables without editing site code every time.
Conversion linker: A GTM tag that stores ad click information so Google can connect clicks to later conversions.
Enhanced conversions: A feature that sends hashed first-party user data, such as email, to improve attribution when cookies are limited.
Google's Ads documentation and Tag Manager guidance now center setup around the Google tag, GTM, and enhanced conversions. That is the direction of travel. Build there.
Step 1: Define the Right Conversion Actions
Start with measurement design. Before you touch GTM, write down what should count as success.
For ecommerce, this is usually straightforward:
Purchase
Subscription start
High-value checkout completion
For lead generation, be stricter:
Demo request
Quote request
Qualified contact form submission
Booked consultation
A newsletter sign-up can be useful, but it is usually a secondary conversion. Same with PDF downloads. To be blunt, if your sales team would not call it pipeline, be careful about making it a primary Google Ads conversion.
In Google Ads, go to Goals > Conversions > Summary, choose New conversion action, select Website, then create the action. Set the category, name, value, count method, and attribution settings.
Use clear naming
Name conversions so a new team member understands them in five seconds. Good examples:
Lead - Demo Request - Website
Purchase - Online Store - Dynamic Value
Signup - Free Trial - Website
Bad examples:
Conversion 1
Submit
New Tag Test
Messy names become a tax later. They show up in reports, bidding settings, imports, dashboards, and board slides.
Conversion tracking is only one part of a successful performance marketing strategy. A Certified Digital Marketing Expert credential helps professionals strengthen their understanding of campaign planning, customer acquisition, analytics, attribution, and multi-channel marketing, ensuring conversion data is used effectively to drive business growth.
Step 2: Choose Your Implementation Method
There are three common paths for Google Ads conversion tracking setup. Pick based on your site, team, and risk level.
Option 1: Direct Google tag setup
This works for smaller sites, simple landing pages, and platforms with built-in Google Ads fields. Ecwid, for example, documents a workflow where you create a Purchase conversion in Google Ads, copy the Google tag and event snippet, then paste them into its tracking settings.
Use this route when:
You have a simple site with one or two conversions.
Your ecommerce platform has a tested Google Ads integration.
You do not have GTM installed and do not need advanced event rules.
The basic process is:
Create the conversion action in Google Ads.
Copy the Google tag.
Install it across all pages, usually in the site header.
Add the event snippet on the conversion event or confirmation page.
Test with Tag Assistant and Google Ads diagnostics.
This is simple. It is also less flexible. If marketing frequently changes landing pages, forms, and events, GTM is usually the better fit.
Option 2: Client-side setup with Google Tag Manager
This is the default choice for most professional marketers and agencies. GTM gives you cleaner control over tags, triggers, and variables.
Your standard GTM setup should include:
Google tag: Fires on all pages using your AW-prefixed conversion ID.
Conversion Linker: Fires on all pages.
Google Ads Conversion Tracking tag: Fires only when the conversion happens.
Variables: Pass value, currency, transaction ID, email, or phone where appropriate.
Triggers: Define the actual conversion event.
For a form submission, do not rely blindly on a button click trigger. A click is not a lead. Users can click and fail validation. Better options include a successful form submission trigger, a thank-you page trigger with safeguards, or a custom dataLayer event fired only after the server accepts the form.
For example, your developer can push this after a valid form submission:
dataLayer.push({'event': 'demo_request_submitted'});
Then in GTM, create a Custom Event trigger matching demo_request_submitted exactly. Case matters. Spaces matter. This is the type of detail that trips people up in audits.
Option 3: Server-side Google Tag Manager
Server-side GTM routes browser events to a server container, then sends approved data to Google Ads and other platforms. Providers such as Stape document this architecture for Google Ads conversion tracking, including server containers, server conversion linker tags, and Google Ads conversion tags in the server container.
Use server-side tracking when:
You have high media spend and tracking loss is material.
You need more control over data sent to ad platforms.
Your site is affected by browser restrictions, ad blockers, or complex consent rules.
You have engineering support to maintain it.
Do not choose server-side GTM just because it sounds advanced. It adds hosting, monitoring, consent, and debugging work. For a small lead-gen site spending a modest budget, clean client-side GTM may be the better trade-off.
Step 3: Configure Value, Count, and Transaction Data
Google Ads optimization improves when conversion data reflects business value. A $40 purchase and a $4,000 purchase should not send the same value.
For ecommerce
Pass dynamic values through GTM variables or the platform integration:
Value: Order total, or margin-based value if you have it.
Currency: ISO currency code, such as USD or GBP.
Transaction ID: A unique order ID to reduce duplicate counting.
Set the conversion count to Every for purchases. If one ad click leads to three separate orders, you probably want all three counted.
For lead generation
Use estimated values. This is not perfect, but it beats treating all leads as equal.
A simple formula works:
Lead value = close rate x average deal value
If 10 percent of demo requests become customers and the average deal is $2,000, assign a value of $200 to that conversion. Review it quarterly. Sales quality changes.
Set the conversion count to One for most lead forms. If the same person submits the same form three times after one click, that is not three real opportunities.
Step 4: Set Up Enhanced Conversions
Enhanced conversions help Google match conversions more accurately by sending hashed first-party data, such as an email address or phone number. Google documents enhanced conversions as a way to improve measurement when traditional identifiers are less reliable.
In GTM, you can configure user-provided data variables and map them into your Google Ads conversion tag. Collect this data only where you have the right consent and a clear privacy policy.
Use enhanced conversions for:
Purchases with logged-in or checkout email data.
Lead forms where email is submitted.
Trial signups and account registrations.
Skip it if your consent setup is unclear. Tracking quality matters, but compliance matters more.
Step 5: Test Before You Publish
Testing is where weak setups reveal themselves. Run a simple QA routine every time.
Open GTM Preview mode.
Load the landing page from the preview session.
Complete the conversion action as a real user would.
Confirm the Google tag fires.
Confirm the Conversion Linker fires on all pages.
Confirm the Google Ads Conversion Tracking tag fires only once.
Check that value, currency, and transaction ID are populated correctly.
Use Google Tag Assistant and Google Ads diagnostics to verify receipt.
Publish the GTM container only after passing QA.
One practical tip: test failed form submissions too. If your conversion tag fires when a required field is missing, your trigger is wrong.
Reliable measurement also depends on broader technical knowledge, including tag management, web technologies, data integration, APIs, and analytics implementation. A Tech Certification helps professionals build these complementary skills, making it easier to deploy and maintain accurate tracking systems across modern digital platform
Common Mistakes That Distort Reporting
Tracking button clicks as leads: Clicks are intent, not completed conversions.
Missing conversion linker: Attribution can suffer, especially across sessions and domains.
Duplicate purchase tags: This happens when both a platform integration and GTM fire the same conversion.
No transaction ID: Refreshing an order confirmation page may create duplicate conversions.
Wrong count setting: Every is right for purchases, often wrong for leads.
Using page URLs that change: Thank-you page triggers break when developers update routes.
No documentation: Six months later, nobody knows why a tag exists.
How This Connects to Professional Digital Marketing Skills
Google Ads conversion tracking setup sits at the intersection of paid media, analytics, web development, and business strategy. If you manage campaigns, you should be comfortable reading GTM Preview mode, checking a dataLayer event, and explaining why a primary conversion should map to revenue or qualified pipeline.
For deeper study, this topic pairs well with Universal Business Council digital marketing programmes, especially modules that cover performance marketing, marketing analytics, campaign measurement, and paid media optimization.
What to Do Next
Audit one account this week. Open Goals > Conversions > Summary in Google Ads and check each primary conversion. Ask three questions:
Does this action represent real business value?
Does the tag fire once, and only after the action is complete?
Are value, currency, count setting, and enhanced conversions configured correctly?
If any answer is unclear, fix the measurement before adjusting bids. Better conversion tracking will not rescue a weak offer, but bad tracking can ruin a good campaign. Start with clean signals, then let your optimization work from facts.
As marketing technology continues to evolve with AI-driven automation, privacy-first measurement, and advanced analytics infrastructure, professionals benefit from developing a deeper understanding of the technologies behind these systems. A Deep Tech Certification provides valuable knowledge of emerging technologies, enabling marketers and technical teams to make more informed decisions when implementing sophisticated digital marketing solutions.
FAQs
1. What is Google Ads conversion tracking?
Google Ads conversion tracking is a feature that measures valuable actions users take after interacting with your ads, such as purchases, form submissions, phone calls, newsletter sign-ups, or app installs. It helps advertisers understand campaign performance and optimize advertising spend based on measurable business outcomes.
2. Why is conversion tracking important?
Conversion tracking provides data that shows which keywords, ads, audiences, and campaigns generate meaningful results. This information helps businesses make informed decisions about budget allocation, bidding strategies, and campaign optimization rather than relying solely on clicks or impressions.
3. What types of conversions can Google Ads track?
Google Ads can track website purchases, lead form submissions, phone calls, newsletter registrations, app downloads, in-app actions, offline conversions, local actions, and imported conversions from supported platforms such as Google Analytics.
4. How do you set up Google Ads conversion tracking?
The setup process typically involves creating a conversion action in Google Ads, installing the Google tag (or Google Tag Manager), placing the appropriate event snippet on your website, verifying that tracking works correctly, and testing conversions before launching campaigns.
5. What is the Google tag?
The Google tag is a website tracking script that collects data for Google Ads and other supported Google products. It enables conversion measurement, audience creation, remarketing, and campaign performance analysis across eligible websites.
6. Should I use Google Tag Manager or the Google tag?
Both options are supported. Google Tag Manager simplifies tag deployment and ongoing management without requiring frequent code changes, while the Google tag provides a direct implementation suitable for many websites with simpler tracking requirements.
7. What conversion actions should businesses track?
Businesses should track actions that directly support their goals, including completed purchases, qualified lead submissions, appointment bookings, quote requests, contact form completions, phone calls, subscription sign-ups, and other meaningful customer interactions.
8. How do enhanced conversions improve measurement?
Enhanced Conversions use first-party customer data, collected with appropriate consent where required, to improve conversion measurement accuracy while supporting Google's privacy-focused measurement technologies. This can help recover conversions that might otherwise be difficult to attribute.
9. How does Google Analytics integrate with Google Ads?
Google Analytics can share conversion events, audiences, and behavioral insights with Google Ads when the accounts are properly linked. This integration provides advertisers with a broader understanding of customer journeys across multiple marketing channels.
10. What are primary and secondary conversions?
Primary conversions are the actions Google Ads uses for bidding optimization and campaign reporting by default. Secondary conversions are tracked for analysis but are generally excluded from automated bidding unless their settings are changed.
11. How do attribution models affect conversion reporting?
Attribution models determine how conversion credit is assigned across multiple customer interactions before a conversion occurs. The chosen model can influence reporting and campaign evaluation, making it important to select one that aligns with your marketing objectives.
12. What are common Google Ads conversion tracking mistakes?
Frequent issues include duplicate conversion tags, missing event snippets, incorrect conversion values, tracking the wrong page, failing to test implementations, ignoring consent requirements, and not excluding internal traffic during testing.
13. How can AI improve conversion tracking?
AI helps advertisers analyze conversion data, identify optimization opportunities, improve bidding strategies, predict conversion likelihood, detect anomalies, and automate campaign adjustments using machine learning capabilities available within Google Ads.
14. How do privacy regulations affect conversion tracking?
Businesses should comply with applicable privacy regulations such as GDPR, CCPA, and other local data protection laws where relevant. Consent management, transparent privacy notices, and proper handling of customer data are important parts of a compliant tracking implementation.
15. Which Google Ads campaign types support conversion tracking?
Search, Performance Max, Display, Shopping, Demand Gen, Video, and App campaigns can all use conversion tracking to measure campaign effectiveness, provided the appropriate conversion actions are configured.
16. How can businesses verify that conversion tracking is working?
Advertisers can use Google Tag Assistant, Google Tag Manager Preview mode, browser developer tools, Google Ads diagnostics, and test conversions to verify that tags fire correctly and conversion events are successfully recorded.
17. What metrics should marketers monitor after setup?
Key metrics include conversions, conversion rate, cost per conversion (CPA), conversion value, return on ad spend (ROAS), click-through rate (CTR), impression share, customer acquisition cost (CAC), and attribution reports.
18. What trends are shaping Google Ads conversion tracking in 2026?
Major trends include AI-powered bidding, Enhanced Conversions, first-party data strategies, privacy-preserving measurement, Consent Mode, cross-device attribution, server-side tagging, predictive analytics, and deeper integration between Google Ads and Google Analytics.
19. How often should conversion tracking be reviewed?
Conversion tracking should be reviewed regularly, particularly after website updates, campaign launches, new product releases, or significant business changes. Periodic audits help ensure data accuracy and support effective campaign optimization.
20. What is the long-term outlook for Google Ads conversion tracking?
Conversion tracking will remain a foundational component of digital advertising as measurement evolves toward privacy-aware, AI-assisted, and first-party data strategies. Businesses that maintain accurate tracking, regularly validate implementations, and adapt to changing privacy requirements will be better positioned to make informed marketing decisions. Setting up the tags is only the beginning. Convincing every browser, cookie, and privacy setting to cooperate is where digital marketing quietly becomes an endurance event.
Related Articles
View All
Digital Marketing
Google Ads Remarketing Guide: How to Re-Engage Website Visitors
A practical Google Ads remarketing guide for re-engaging website visitors with audience segmentation, dynamic ads, RLSA, first-party data, and better measurement.
Digital Marketing
Google Ads Certification Guide: How to Prepare and Pass
Prepare for Google Ads certification with exam rules, study tips, Skillshop strategy, practice steps, and practical advice to pass with confidence.
Digital Marketing
Google Ads PPC Guide: How Pay-Per-Click Advertising Works
Learn how Google Ads PPC works, from keywords and auctions to CPC, campaign types, tracking, optimization, and practical PPC strategy.
Trending Articles
The Role of Blockchain in Ethical AI Development
How blockchain technology is being used to promote transparency and accountability in artificial intelligence systems.
AWS Career Roadmap
A step-by-step guide to building a successful career in Amazon Web Services cloud computing.
Top 5 DeFi Platforms
Explore the leading decentralized finance platforms and what makes each one unique in the evolving DeFi landscape.