How to Create a Meta Ads Account
Introduction: Why Meta Ads Are Still the Most Powerful Advertising Platform in 2026
Meta Ads reach over 3 billion people across Facebook, Instagram, Messenger, and the Audience Network.No other social advertising platform comes close to that combined reach. And yet, the most common mistake beginners make is skipping the foundation jumping straight into creating ads without properly setting up the infrastructure that makes those ads perform.
Think of it like building a house. You would not start hanging curtains before pouring the foundation and framing the walls. A properly configured Business Portfolio, ad account, tracking pixel, and product catalogue are the foundation that everything else is built on.

This guide walks you through every step of creating and configuring a Meta Ads account from scratch in the correct order, with the reasoning behind each decision. Whether you are running your first campaign as a small business owner, setting up for a client as a freelancer, or building out a professional advertising operation for a growing brand, every step in this guide applies to you.
Meta has rolled out major changes in 2026 from simplified campaign objectives to AI-driven automation and a new account structure that confuses many beginners and even experienced advertisers. This guide reflects those 2026 changes accurately, so you are not following outdated instructions.
Professionals who want to build verified credentials in Meta advertising covering account architecture, campaign management, audience strategy, and optimisation best practices benefit from becoming a Certified Meta Ads Expert through the Universal Business Council. This certification maps directly to the setup and campaign management skills covered in this guide.
Before You Start: What You Need to Create a Meta Ads Account
Before you open any Meta page, make sure you have the following ready:
A personal Facebook account. All Meta business accounts are created through a personal Facebook profile. Your personal and business activities remain completely separate, but the personal account is required to verify your identity.
A business email address. Use a professional email at your business domain not a Gmail or personal account. This email is where Meta sends account notifications, billing alerts, and security warnings.
Your business name and address. Used for account verification and billing.
A credit or debit card. Prepaid cards are often rejected. Meta prefers standard credit or debit cards tied to bank accounts.
Your website URL. Required for the Meta Pixel setup if you plan to track website visitors.
Once you have all of the above, you are ready to begin.
Step 1 Create a Meta Business Account (Business Portfolio)
The starting point for all Meta Ads is not the Ads Manager it is the Meta Business Portfolio. Previously called Meta Business Manager, this was officially renamed in 2025, though many guides still use the older name.
Your Business Portfolio account is the container for everything else. You will create your account, connect your Facebook Page and Instagram, set up team permissions, and start business verification.
How to do it:
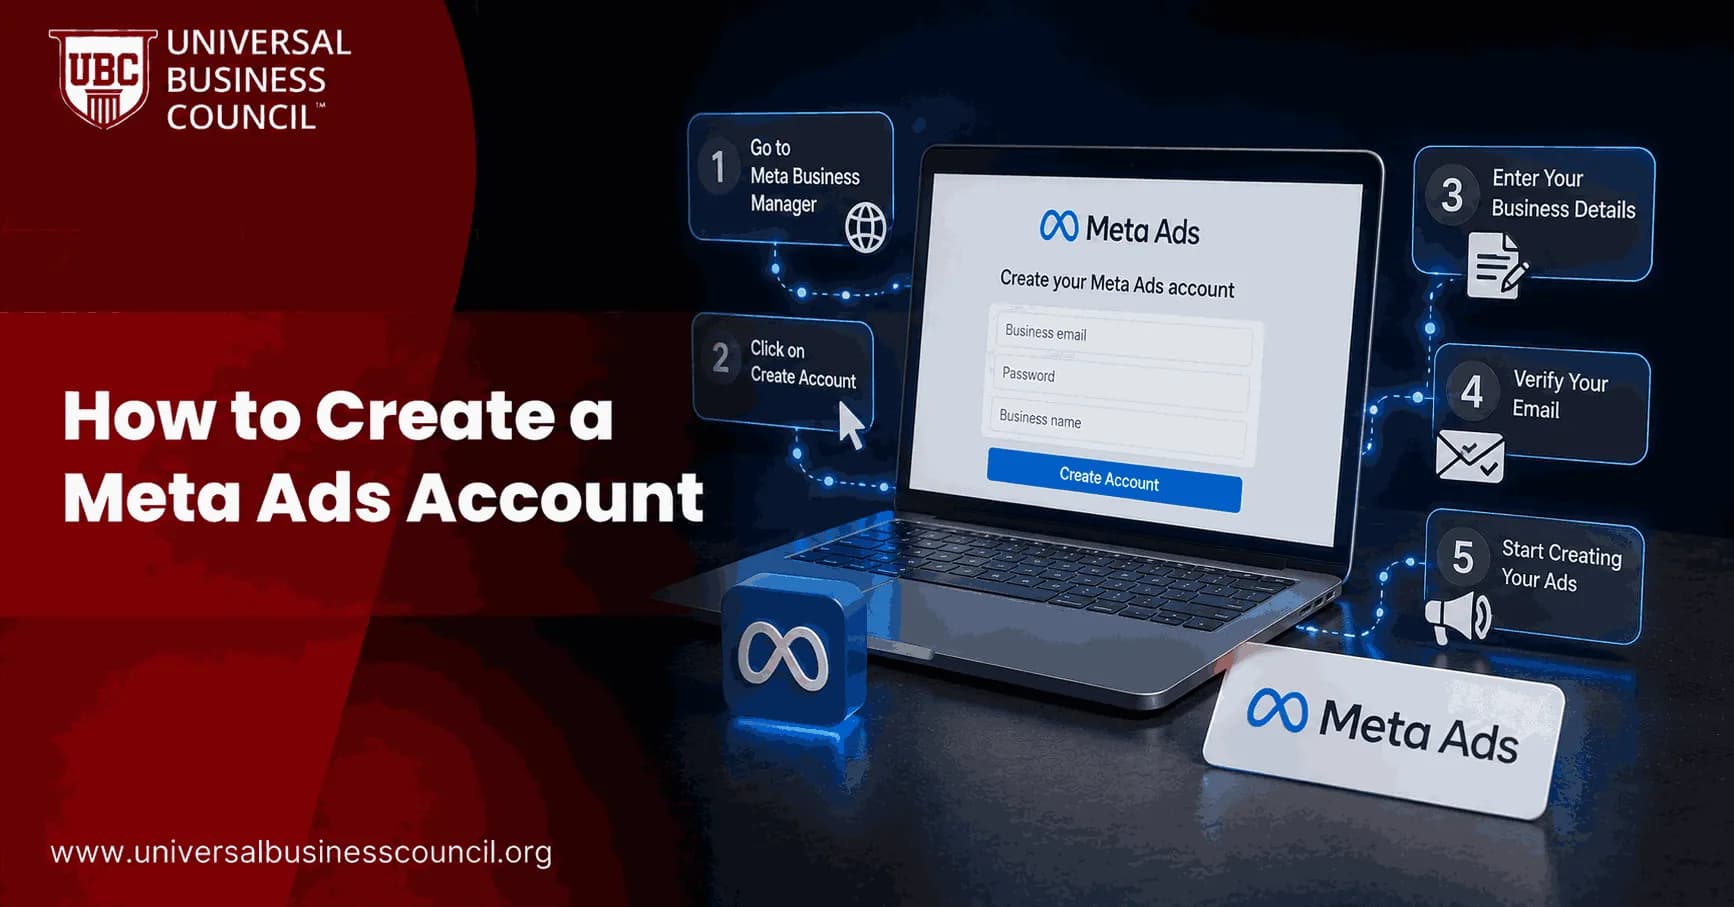
Go to business.facebook.com. Click "Create Account." Log in with your personal Facebook account. Enter your business name, your name, and your business email address. Verify your email when Meta sends the confirmation link.
Once your Meta business account has been created, you will be able to access Meta Business Suite, create a Business Portfolio, and continue setting up the assets needed to run ads.
After verification, you land in your Business Settings dashboard. Locate and save your Business ID a unique number you will need when contacting Meta Support or integrating with third-party tools. You will find it in the Business Info section.
Enable login alerts immediately. In Business Settings > Security Centre, turn on login notifications so you receive an alert any time your account is accessed from a new device. This simple step prevents unauthorised access.
Step 2 Add Your Facebook Page
Every Meta Ads campaign requires a Facebook Page to represent your business. If you do not already have one, you will create it here.
How to do it:
Inside Business Settings, navigate to Accounts > Pages. Click "Add." You have three options:
Add an existing Page you own. Create a new Page directly within Business Portfolio. Request access to a Page you manage for a client.
If the Page belongs to your own business, choose "Add a Page." If you are setting up advertising for a client, choose "Request Access" this keeps the Page ownership with the client while giving you managed access.
Complete your Page by filling out the About section, operating hours, business description, and contact information. A complete Page builds credibility with users who click through from your ads.
Step 3 Connect Your Instagram Account
Open Meta Business Suite and go to Settings > Accounts > Instagram Accounts to connect your Instagram Business profile.
Connecting your Instagram account allows you to run Instagram feed ads, Reels ads, and Stories ads through the same Meta Ads infrastructure as your Facebook campaigns. If you do not have an Instagram Business account yet, convert your personal Instagram account to a Business account in the Instagram app settings first.
This step takes less than two minutes and significantly expands your available ad placement inventory. Most advertisers in 2026 run campaigns across both Facebook and Instagram simultaneously connecting your Instagram account makes this possible.
Step 4 Create Your Meta Ads Account
The ad account is where your campaigns live. It holds your payment method, campaign history, audience lists, and performance data.
How to do it:
In Business Settings, navigate to Accounts > Ad Accounts. Click "Add" and then "Create a New Ad Account."
Name your ad account clearly. "Main Ad Account" works for single-business setups. Agencies might use "ClientName_Ads_2026" to distinguish between multiple accounts.
Now make two decisions that cannot be changed later:
Time zone. Select the timezone where you will primarily manage campaigns. If your team spans multiple zones, pick the location of whoever makes budget decisions. Your reporting, billing cycles, and campaign schedules all operate on this timezone.
Currency. Choose the currency you will use for billing and reporting. Most businesses select their local currency. Whatever you select becomes your financial reporting standard forever.
Critical warning: choose your timezone and currency carefully Meta does not let you change these after creation. If you make an error, you will need to create an entirely new ad account.
After creating the account, assign yourself or key team members to it with appropriate roles: Advertiser (can create and edit campaigns), Analyst (can view data only), or Admin (full control including billing).
Step 5 Add Your Payment Method
Without a valid payment method, your Meta Ads account cannot run campaigns.
How to do it:
Inside Ads Manager, navigate to the Billing section. Click "Payment Methods" and then "Add Payment Method." Enter your credit or debit card details.
Important payment considerations: Payment methods are linked at the ad account level, not the Business Portfolio level. Payment blocks are permanent and platform-wide. If a payment method fails repeatedly, Meta blocks it across all Business Portfolios not just yours. You cannot use a blocked card in a new Business Portfolio. If this happens, you need to contact Meta Support to resolve it.
Set a billing threshold, a spending amount at which Meta charges your card. Keeping this set to a relatively low number initially (such as $25 or $50) means you are charged frequently but in smaller amounts, which helps you monitor spending closely while the account is new.
Step 6 Verify Your Domain
Domain verification confirms to Meta that you own the website your ads will send traffic to. In 2026, this is not optional for most campaign types.
Unverified domains cannot run proper conversion campaigns in 2026.
How to do it:
In Business Settings, navigate to Brand Safety > Domains. Click "Add Domain" and enter your website URL. Meta gives you two verification methods: add a DNS TXT record through your domain host, or upload a verification HTML file to your website server.
It can take up to 72 hours for DNS changes to propagate. Do not panic if verification does not confirm immediately.
Once your domain is verified, Meta can accurately attribute conversions, run retargeting campaigns, and access the full range of performance-based campaign features.
Step 7 Install the Meta Pixel
The Meta Pixel is the tracking code that connects your website to your Meta Ads account. It records what visitors do after clicking your ads page views, form submissions, purchases, and custom events feeding that data back to your campaigns for optimisation and retargeting.
How to do it:
Navigate to Events Manager in Business Settings. Click "Connect Data Sources" and select "Web." Choose "Meta Pixel." Give your pixel a descriptive name like "MainWebsite_Pixel_2026" and enter your website URL.
Install the Pixel code on your website using one of these methods: manually by pasting the code into your website's header, via Google Tag Manager, or through direct platform integrations for Shopify, WooCommerce, or Squarespace.
After installation, verify that it is working correctly using the Meta Pixel Helper browser extension. This tool shows you in real time which events are firing on each page.
A pixel installed incorrectly tracks nothing. Always verify with the Pixel Helper before spending a single dollar on ads.
If you are running conversion campaigns, also set up the Conversions API alongside the Pixel. The Conversions API sends server-side event data directly to Meta, improving tracking accuracy especially for users who have browser-based ad blockers installed.
Step 8 Configure Business Verification
Business verification is the process of confirming to Meta that your business is a legitimate, registered organisation. It unlocks higher spending limits, advanced campaign features, and stronger account trust signals.
How to do it:
Navigate to Business Settings > Security Centre. Click "Start Verification" under Business Verification. Select your business type. Provide the required documentation typically a business licence, tax registration document, or articles of incorporation.
Enter your business information exactly as it appears on your documents name, address, and phone number must match precisely.
Business verification typically takes between two and seven business days to complete. While you wait, you can begin creating campaigns your spending limits will be expanded once verification is approved.
Step 9 Understand the 2026 Meta Ads Campaign Structure
Before launching your first campaign, understand how Meta Ads are structured in 2026. Every campaign has three levels:
Campaign level: Where you choose your buying type (Auction or Reservation) and your objective. Meta has reduced objectives into six main categories in 2026: Awareness, Traffic, Engagement, Leads, App Promotion, and Sales. Choose the objective that most accurately reflects the action you want people to take; this determines how Meta's algorithm optimises your delivery.
Ad Set level: Where you define your audience, placement, budget, and schedule. This is where you choose who sees your ads, where they appear (Facebook Feed, Instagram Reels, Stories, Audience Network), how much you spend per day, and when your campaign runs.
Ad level: Where you create the individual ad the creative, copy, headline, description, and call-to-action button that users actually see.
Step 10 Create Your First Meta Ads Campaign
With your account set up, your pixel installed, and your domain verified, you are ready to create your first campaign.
How to do it:
Open Ads Manager at business.facebook.com/adsmanager. Click the green "Create" button. Select your buying type for most beginners, select "Auction." Select your campaign objective based on your goal.
Name your campaign clearly. Name it after the campaign strategy, not just the product for example, "Retargeting_CartAbandoners_July2026" is more useful than "Summer Sale."
Set your campaign budget at the campaign level if you are using Campaign Budget Optimisation (CBO) the recommended setting for 2026, as it allows Meta's algorithm to distribute budget across your ad sets automatically toward the best-performing audiences.
At the Ad Set level, define your audience. For brand-new accounts, start with one to two percent Lookalike Audiences or interest-based audiences. Advantage+ Audience is powerful but only if your Pixel already has conversion data.
Set your placement. For most campaigns, use Advantage+ Placements and allow Meta to decide where your ads perform best across Facebook, Instagram, Stories, and Reels.
At the Ad level, upload your creative and write your copy. Always send ad traffic to a dedicated landing page that matches your ad's promise. Homepages kill conversions.
Review all settings and click Publish. Your ad will enter the review process, which typically takes 24 hours.
The 2026 Changes Every Meta Ads Advertiser Must Know
Meta has simplified and automated significant parts of the advertising system in 2026, making it easier for beginners but requiring experienced advertisers to rethink some established practices.
Advantage+ campaigns are Meta's AI-powered campaign type that automates audience targeting, placement, and creative testing simultaneously. For e-commerce advertisers with active pixels, Advantage+ Shopping campaigns typically outperform manually configured campaigns.
Simplified objectives reduce the previous eight objectives to six cleaner categories, eliminating some of the setup confusion that beginner advertisers faced previously.
AI creative tools are now integrated into the ad creation workflow, offering automatic image and text variation generation, background removal, and caption suggestion. These tools accelerate creative testing significantly.
For digital marketing professionals who want to build comprehensive expertise across the full marketing technology stack combining social advertising with search engine optimisation, content strategy, email marketing, analytics, and brand strategy a Certified Digital Marketing Expert credential from the Universal Business Council provides the breadth and depth required for senior marketing roles and agency leadership positions.
Common Mistakes to Avoid When Setting Up Meta Ads
Using the "Boost Post" button instead of Ads Manager. Boosting is Meta's trap for beginners. It gives almost zero targeting control and burns budget faster than any real campaign. Always use Ads Manager for any serious advertising.
Choosing the wrong objective. Selecting Traffic when you want Sales causes Meta to optimise for clicks from people who are unlikely to purchase. Match your objective to your actual business goal.
Setting timezone and currency incorrectly. These cannot be changed after creation. Double-check both before saving your ad account.
Not verifying the Pixel before spending. An incorrectly installed Pixel tracks nothing, meaning all conversion data is lost and Meta's algorithm cannot optimise your campaigns.
Giving too many people Admin access. Admins can modify billing, delete assets, and change permissions. Restrict Admin access to a minimum of trusted individuals.
Building Your Meta Ads Expertise
Creating your Meta Ads account is the beginning, not the end. Running consistently profitable campaigns requires ongoing skill development understanding audience strategy, creative testing frameworks, bid management, attribution modelling, and how Meta's algorithm learns and optimises.
For technology professionals working at the intersection of advertising technology and digital infrastructure building reporting systems, API integrations, and data pipelines that support Meta Ads operations at scale a Tech Certification from the Global Tech Council provides the practical, credential-backed technical knowledge needed to design and maintain the systems that professional advertising operations depend on.
For professionals who want to deepen their understanding of the emerging technology landscape that underpins digital advertising including AI, blockchain-based identity verification, Web3 advertising models, and the data infrastructure reshaping privacy-first tracking a Deep Tech Certification from the Blockchain Council provides the foundational knowledge of the technologies that will define the next generation of digital advertising platforms.
Frequently Asked Questions (FAQs)
What Is a Meta Ads Account?
A Meta Ads account is the container within Meta Business Portfolio where you create, manage, and pay for advertising campaigns across Facebook, Instagram, Messenger, and the Audience Network. It holds your billing information, campaign history, audience lists, and performance reporting data.
Is Meta Ads the Same as Facebook Ads?
Yes. Meta Ads is the unified brand name for advertising across all Meta-owned platforms including Facebook, Instagram, Messenger, and the Audience Network. What was previously called Facebook Ads is now Meta Ads, managed through Meta Ads Manager.
Do I Need a Business Account to Run Meta Ads?
Yes. As of 2026, you must create a Meta Business Portfolio (formerly Meta Business Manager) to create professional ad accounts. You cannot create new ad accounts with meaningful features through a personal Facebook profile.
How Long Does It Take to Set Up a Meta Ads Account?
The initial account creation takes approximately 15 to 30 minutes. Domain verification and business verification take longer, domain verification can take up to 72 hours, and business verification typically takes two to seven business days. You can begin running campaigns before verification is complete, but with lower spending limits.
Is Meta Ads Free to Set Up?
Creating a Meta Ads account and Business Portfolio is completely free. Costs only arise when you run paid ad campaigns. There are no setup fees, monthly software charges, or minimum spend requirements to access the platform.
What Is the Meta Pixel and Do I Need It?
The Meta Pixel is a tracking code installed on your website that records what visitors do after clicking your ads. It is required for conversion campaigns, retargeting campaigns, and Lookalike Audience creation based on your website visitors. In 2026, running conversion-focused Meta Ads without a properly installed Pixel severely limits campaign performance.
What Is the Conversions API and Do I Need It?
The Conversions API is a server-side tracking method that supplements the browser-based Meta Pixel. It sends event data directly from your server to Meta, improving tracking accuracy for users with ad blockers or restricted browser cookies. In 2026, implementing both the Pixel and Conversions API together is the recommended tracking setup for most advertisers.
Why Can I Not Change My Ad Account Currency After Creation?
Meta locks currency and timezone settings at ad account creation because changing them would distort historical reporting data and billing records. If you created an ad account with the wrong currency, you need to create a new ad account with the correct settings.
How Many Ad Accounts Can I Create in Meta Business Portfolio?
A standard Meta Business Portfolio can create up to five ad accounts. Higher limits are available after demonstrating legitimate advertising activity and completing business verification. Agencies can access more ad accounts through partner arrangements with clients.
What Should I Do If My Meta Ads Account Is Restricted?
Navigate to Account Quality in Business Settings. Meta shows which assets are restricted, the reason for restriction, and the option to request a review. Submit a review explaining your business operations and how your advertising complies with Meta's policies. Reviews typically receive a response within two to five business days.
What Are the Six Meta Ads Campaign Objectives in 2026?
Meta simplified its objectives to six in 2026: Awareness (reach as many people as possible), Traffic (send users to your website or app), Engagement (maximise comments, shares, and interactions), Leads (collect contact information), App Promotion (drive app installs or events), and Sales (drive purchases or conversions). Choose the objective that reflects the actual outcome you want from your campaign.
What Is the Difference Between Auction and Reservation Buying?
Auction buying is the standard method where your ad competes with other advertisers for placement in real time, with delivery optimised by Meta's algorithm. Reservation buying (previously Reach and Frequency) allows you to reserve specific reach and frequency in advance, locking in predictable delivery for brand campaigns. Most performance advertisers use Auction.
What Is Advantage+ and When Should I Use It?
Advantage+ is Meta's AI-powered campaign type that automates audience targeting, placement, and creative testing. For e-commerce advertisers with active pixels and sufficient conversion data, Advantage+ Shopping campaigns consistently deliver lower cost per acquisition than manually configured campaigns. For new accounts without pixel data, start with manually configured campaigns to build the data foundation first.
How Much Should I Budget for My First Meta Ads Campaign?
Most experts recommend a minimum of $10 to $20 per day for an initial test campaign, with a commitment to run for at least two weeks before drawing conclusions. Meta's algorithm needs approximately 50 conversions per ad set within a seven-day period to exit the learning phase underfunded campaigns may never gather enough data to optimise effectively.
Should I Use Automatic or Manual Placements for Meta Ads?
For most campaigns, use Advantage+ Placements (automatic) and allow Meta to determine where your ads perform best across Facebook, Instagram, Stories, Reels, and the Audience Network. Meta's algorithm typically identifies the best-performing placements more accurately than manual selection, particularly for accounts with limited data history.
How Do I Add Team Members to My Meta Ads Account?
In Business Settings, go to People and click Add. Invite team members by their email address. Once they accept, assign them to specific ad accounts with appropriate roles: Analyst for view-only access, Advertiser for campaign management, or Admin for full account control including billing.
How Do I Grant an Agency Access to My Meta Ads Account?
In Business Settings, go to Partners and click Add. Enter the agency's Business Portfolio ID. You can then assign the agency access to specific assets Pages, ad accounts, Pixels with appropriate permission levels. This keeps ownership of all assets with your business while giving the agency the access they need to manage campaigns.
What Security Settings Should I Enable on My Meta Ads Account?
Enable Two-Factor Authentication for all users, set up login alerts to be notified of access from new devices, use the minimum necessary permissions for each team member, and regularly review the audit log in Business Settings to monitor what actions have been taken on your account. These steps together substantially reduce the risk of unauthorised access.
Can Multiple People Manage the Same Meta Ads Account?
Yes. Meta Business Portfolio is designed for team-based access. Multiple people can be assigned to the same ad account with different roles simultaneously. One person can be the Analyst, another the Advertiser, and a third the Admin all active at the same time.
What Should I Do If I Lose Access to My Meta Ads Account?
If you lose access to your personal Facebook account that controls your Business Portfolio, contact Meta Support immediately through the Business Help Centre. If a team member who was an Admin leaves your organisation, any remaining Admin can remove their access through Business Settings > People. Always ensure at least two trusted Admins have access to prevent single-point-of-failure lockouts.
Related Articles
View AllMeta Ads
How to Set Up a Meta Ads Account the Right Way
Learn how to set up a Meta Ads account with the right business structure, permissions, billing, tracking, and domain verification before launch.
Meta Ads
Meta Ads Manager Guide: Create, Manage, and Analyze Campaigns
A practical Meta Ads Manager guide for setting up campaigns, managing budgets and audiences, tracking events, and analyzing ROAS, CPA, CTR, and conversions.
Meta Ads
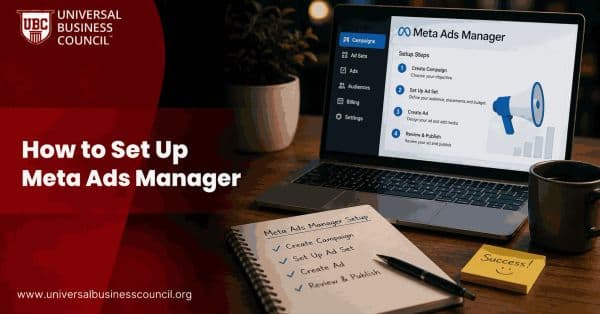
How to Set Up Meta Ads Manager
Meta Ads Manager is the primary platform for creating, managing, and optimizing advertising campaigns across Facebook, Instagram, Messenger, and the Meta Audience Network. This guide explains how to set up Ads Manager and prepare your account for effective campaign management.
Trending Articles
The Role of Blockchain in Ethical AI Development
How blockchain technology is being used to promote transparency and accountability in artificial intelligence systems.
AWS Career Roadmap
A step-by-step guide to building a successful career in Amazon Web Services cloud computing.
Top 5 DeFi Platforms
Explore the leading decentralized finance platforms and what makes each one unique in the evolving DeFi landscape.